|
Hole by Hole
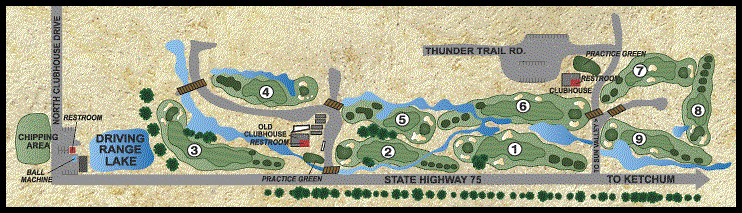
SCORECARD
Welcome to our Hole by Hole! Our seasoned Golf Pros have offered up some tips on the holes to give you
an insight into the mischievous traps and ponds that may await. So take heart, that lunch bet may be yours this round.
 |
|
|
Stats:
Par 4
Smokys - 367
Boulders - 350
White Clouds - 330
Pioneers - 315
Sawtooths - 296
|
|
| CLICK PICTURE FOR MORE DETAIL |
|
|
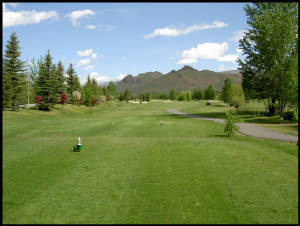
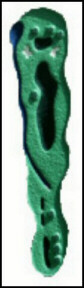
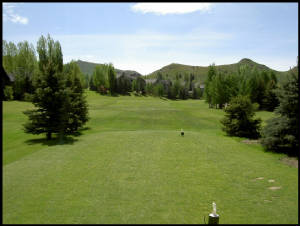
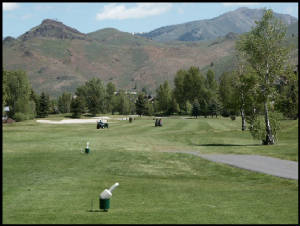
Hole 1
A great warm up hole. Even though it is a short Par 4, a good tee shot is required. This leaves you with a short iron shot to
a deep green. Green Contour/Slope:
slopes back to front.
|
| Hole 1 |
|
| CLICK PICTURE FOR MORE DETAIL |
|
|
|
|
|
|
|
Stats:
Par 4
Smokys - 340
Boulders - 321
White Clouds - 297
Pioneers - 269
Sawtooths - 249
|
|
| CLICK PICTURE FOR MORE DETAIL |
|
|
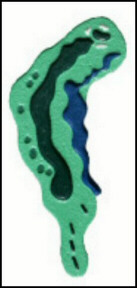
Hole 2 A short Par 4
that’s easy on the scorecard. A well placed lay-up is not a bad idea, because
of a large green that is hard to stick. Pro Advice: The large green is
hard to stick without a full shot.
|
| Hole 2 |
|
| CLICK PICTURE FOR MORE DETAIL |
|
|
|
|
|
|
|
Stats:
Par 5
Smokys - 553
Boulders - 523
White Clouds - 490
Pioneers - 472
Sawtooths - 442
|
|
| CLICK PICTURE FOR MORE DETAIL |
|
|
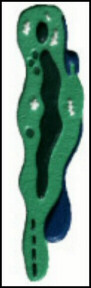
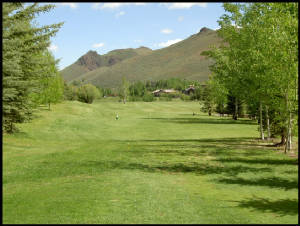
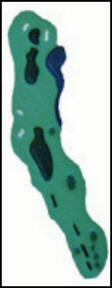
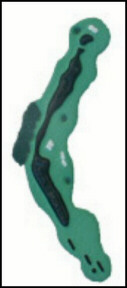
Hole 3
Okay, let’s get that driver
loose! Be very aware of the water to the right that follows almost the entire
length of the fairway. A good second shot can leave you with a great Birdie chance,
but playing it safe guarantees a Par. The green is very wide, but very narrow
from front to back. Pro Advice: When it comes to the green’s pronounced
back to front slope, keeping the ball below the hole is key. Green
Contour/Slope: pronounced back to front.
|
| Hole 3 |
|
| CLICK PICTURE FOR MORE DETAIL |
|
|
|
|
|
|
|
Stats:
Par 4
Smokys - 310
Boulders - 295
White Clouds - 278
Pioneers - 263
Sawtooths - 236
|
|
| CLICK PICTURE FOR MORE DETAIL |
|
|
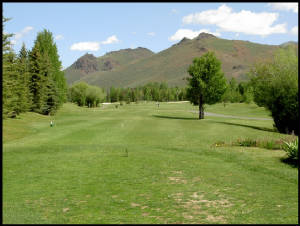
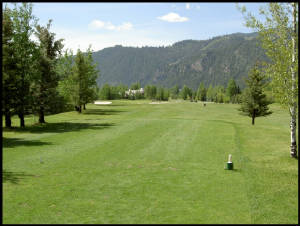
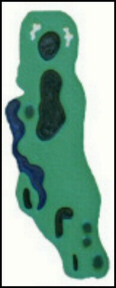
Hole 4 A textbook lay-up
Par 4. Be aware that a pond 225 yards off the tee will eat a lot of bold shots. Pro Advice: Playing it safe is the best chance for a good score.
|
| Hole 4 |
|
| CLICK PICTURE FOR MORE DETAIL |
|
|
|
|
|
|
|
Stats:
Par 3
Smokys - 228
Boulders - 200
White Clouds - 185
Pioneers - 164
Sawtooths - 154
|

|
| CLICK PICTURE FOR MORE DETAIL |
|
|
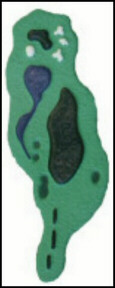
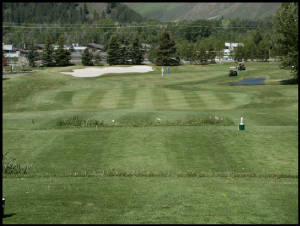
Hole 5 Welcome to hell. This Par 3 is one of the hardest shots on the Bigwood.
Pro Advice: Just try to hit the middle of the green— in general, a Par is a great score.
|
| Hole 5 |
|
| CLICK PICTURE FOR MORE DETAIL |
|
|
|
|
|
|
|
Stats:
Par 4
Smokys - 468/438
Boulders - 421
White Clouds - 391
Pioneers - 374
Sawtooths - 320
|
|
| CLICK PICTURE FOR MORE DETAIL |
|
|
Hole 6 A long Par 4,
known for creating a lot of problems off the tee. Although an intimidating hole,
sporting a creek to the right and bunkers to the left, a large green awaits. Hitting
in with a middle to short iron is usually easiest; however, for bolder hitters, a third shot to the green from here is an
option. Pro Advice: This is a large green that’s easy to hit, just
don’t go right or long.
|
| Hole 6 |
|
| CLICK PICTURE FOR MORE DETAIL |
|
|
|
|
|
|
|
Stats:
Par 5
Smokys - 495
Boulders - 481
White Clouds - 466
Pioneers - 439
Sawtooths - 427
|
|
| CLICK PICTURE FOR MORE DETAIL |
|
|
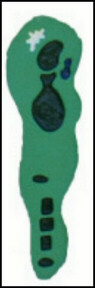
Hole 7 Been bragging
about your scorecard? Welcome to hole 7, a great Par 5. Longer hitters can get into trouble here, with the out-of-bounds to the left and the large bunker dominating
the center. Under way, you will notice that the fairway gets very narrow down
the neck; beyond, it opens up all the way to the green. This long “second
chance” presents Birdie, even Eagle, possibilities. Pro Advice: Be careful of un-even lies. You could
blast your little monogrammed Titleist right off the course.
|
| Hole 7 |
|
| CLICK PICTURE FOR MORE DETAIL |
|
|
|
|
|
|
|
Stats:
Par 3
Smokys - 202/184
Boulders - 167
White Clouds - 150
Pioneers - 145
Sawtooths - 121
|
|
| CLICK PICTURE FOR MORE DETAIL |
|
|
Hole 8 An exciting Par
3 with a commanding view over the hole. The tiered, elevated tee affords the
player a great view of the green and the troubles surrounding it. Initially deceiving,
the green is very large once your ball gets there.
|
| Hole 8 |
|
| CLICK PICTURE FOR MORE DETAIL |
|
|
|
|
|
|
|
Stats:
Par 4
Smokys - 489
Boulders - 460
White Clouds - 432
Pioneers - 412
Sawtooths - 340
|
|
| CLICK PICTURE FOR MORE DETAIL |
|
|
Hole 9 Okay, who’s
buying lunch? Hole 9 is by far the most challenging hole at the Bigwood. A long Par 4 protected by a pond that follows the entire left side short of the green. Pro Advice: Be careful—short or long shots leave a deep second shot that
imposes an impossible chip or putt downhill back towards the pond.
|
| Hole 9 |

|
| CLICK PICTURE FOR MORE DETAIL |
|
|
|
|
|